
When you have just learned a shiny new board game, especially one which is a bit longer and more complex than others, it’s nice to have some strategic direction. That’s what I aim to provide with my series Three Basic Tips – strategy advice for beginner and intermediate players that is easy to remember and yet gets you places.
Today’s game is Unconditional Surrender! (Salvatore Vasta, GMT Games). With its 56-page rulebook and a playtime of 50-100 hours for a full campaign, the game can look a little daunting. Worry not! It’s a surprisingly beginner-friendly system – in fact, it was the first classic hex-and-counter game I ever played, and I turned out just fine. (My mother had me tested!) Follow the recommended learning path of playing the four tutorial scenarios (along with the rules reading each requires), and you’ll be all set up.
While this article is about improving your chances to win, remember that winning is not everything – particularly not in a game that can take this long. In my current two-player game (online via boardgamearena.com), a combination of suboptimal play and bad luck on my part made it clear early on that I was unlikely to win the game. Nonetheless, it’s been a fun experience, and I always look forward to the weekly meeting with my opponent. Remember what the designer himself states as the objective of the game: “Have fun playing” (rule 1.1.1).
Without further ado, let’s get into the tips – one operational, one strategic, one grand strategic.
Match on Defense, Mismatch on Offense
In that regard, Unconditional Surrender! is like a game of gridiron football. If you want to get the chains moving on offense, you need to strike at the defense’s weak spots with something they cannot stop. A rough heuristic for that would be to assess where the die roll modifier (DRM) situation for an attack would be most favorable to you. For example, an attack with a German armored army attacking a Soviet infantry army in clear terrain and fair weather would have a +4 DRM, the defending Soviet army a +/-0. It’s almost guaranteed that your attack will force the defenders to retreat, and you have good chances of disrupting – and even eliminating – the defender. Thus, you can break a hole into the enemy line, possibly encircle some enemy armies next to the victim of your mismatched attack, and force them to fall back or risk that even larger parts of their defensive line are outflanked, cut off, and destroyed.

As an attacker, it is your job to create these mismatches – I’d much rather have the aforementioned 4/0 DRM situation of a German armored army vs. Soviet infantry plus a 2/2 from a German infantry army vs. a Soviet shock army than swap the matchups and have a 4/2 from the German tank vs. Soviet Shock plus a 2/0 from the two infantry armies. For the defender, of course, the reasoning is the other way round – you want the focus of the enemy to be matched with your stronger troops in better defensive positions.
Why would I rather have one strong mismatch and an even match than two weak mismatches ones as the attacker? In the example, the German armored army can likely create an opportunity which the infantry can then exploit. Then the Soviet shock army has been rendered useless and was not given the chance to apply its DRM bonuses even when it’s the Axis turn. And even if the armored attack fails miserably, you can just opt not to attack with the evenly matched infantry and thus save a production point. Which brings us to the next tip.
Adapt Your Production Spending to Your Needs
Okay, I admit that this is the most generic tip ever – but let me explain. Managing your production points (PP) is one of the most important strategic dimensions of the game, as there is almost no situation in which you have enough points to do everything you’d like to do.
First of all: You need to identify your priorities and distinguish between must-haves and nice-to-haves. Some typical situations:
- If you’re playing defense, the integrity of your defensive line is paramount. Build that line, plug those holes, and, if you can’t, fall back and re-build that line. Nothing does you in as quickly as a breakthrough/exploitation combo.
- Second defensive priority: Replenish air fleets to blunt the opponent’s drive.
- If you’re on the offensive and enjoy a base quality advantage over your opponent (say, Germany in 1941 against the Soviet Union), activate as many of your armies as possible for mobile attacks.
- If you’re on the offensive, but your units are weaker than those of your opponent (say, the Soviet Union against Germany in 1944), use air superiority to establish a quality advantage – so replenish your air fleets.
- Once the Western Allies are planning offensives on the European continent, they will almost always need to prioritize their convoys to support as large an invasion force as possible.
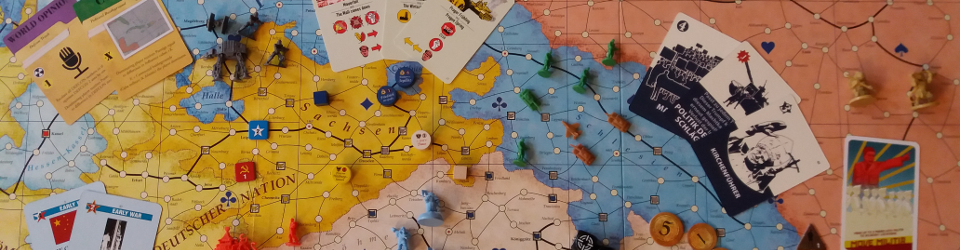
Here’s an example for the Axis, in a game that did not go well for them, December 1942:

The Axis will be on the defense from now on, so the soundness of their defensive lines is paramount. The Axis line in the East needs a few adjustments (notably falling back with the exposed 3rd Panzer in the center), but is generally okay. Not great, but as it’s winter, no great Soviet breakthroughs will happen.
The Western Allies have already liberated most of Italy and landed in France as well. They will need to be stopped in the defensively advantageous terrain of the Alps and contained at their Normandy beachheads. That will require only minimal repositioning of forces.

Once these small movements are complete, the remainder of the production points (around 80%), are spent on replenishing air units and re-mobilizing a few ground units lost in the previous month.
Get the Timing of Conditional Events Right
This is the tip whose application is the least intuitive. After all, the conditional events as such are among the most complex parts of Unconditional Surrender! Their function is to enforce a mildly historical narrative in the game by setting some strict boundaries for what can happen – for example, there is no way the United States will stay out of the conflict, but America can enter as early as 1940 or as late as 1943 based on the Axis player’s decisions. Triggering the events at a convenient time is thus of paramount importance for the Axis player in a campaign game.
West Invaded and East Invaded are the two big conditional events. The Axis needs to trigger them in order to attack and occupy France and the Soviet Union respectively, but these events will also strengthen the attacked party. Thus, the Axis wants to trigger these events at the beginning of a campaigning season of continual good weather to make the most of their attack. Don’t trigger them in poor or severe weather – your attack will go nowhere, but now you face stiffer opposition once the weather improves! A Fair weather May or June are the ideal time to trigger these events.

Closely related: Whichever of the two you are going to trigger second, it should come in the same month in which you’ve declared war on the respective faction. Thus, you delay the American entry into the war as long as possible (the date for that depends on the Axis being at war with both Allied factions). Even more importantly, the end of the game depends on these two states of war, as well: If you’ve triggered both of them between August 1940 and July 1941, the game will end after July 1945, trigger them earlier and you have one fewer, trigger them later and you have one more year to weather.
Which strategies are you using for your success at Unconditional Surrender!? Let me know in the comments!
And if you want more articles of this style, here are the previous Three Basic Tips for…

Pingback: How to Win at War of the Ring (Three Basic Tips, #9) | Clio's Board Games
Pingback: How to Win as the Protestants in Here I Stand (Three Basic Tips, #10) | Clio's Board Games